Getting Started
Not ready to build?
If you'd prefer to learn more about Frames before building one, jump ahead to the Frames Specification.
Let's use Frog to go from 0 to 1 in less than a minute. At the end of this we'll have:
- a type-safe frame server with a basic frame
- a tool for interacting with and debugging our Frame locally
- our server deployed on the public internet
Bootstrap via CLI
To get started, scaffold a new project:
npm init frog -t vercelyarn create frog -t vercelbunx create-frog -t vercelpnpm create frog -t vercelComplete the prompts and follow the instructions:
bun install // install dependencies
bun run dev // start dev server
INFO
This guide uses Frog + Vercel but frames can be built and deployed in any number of ways. You can check out popular alternatives like frame.js on the Frame Developer Resources page.
Open the preview
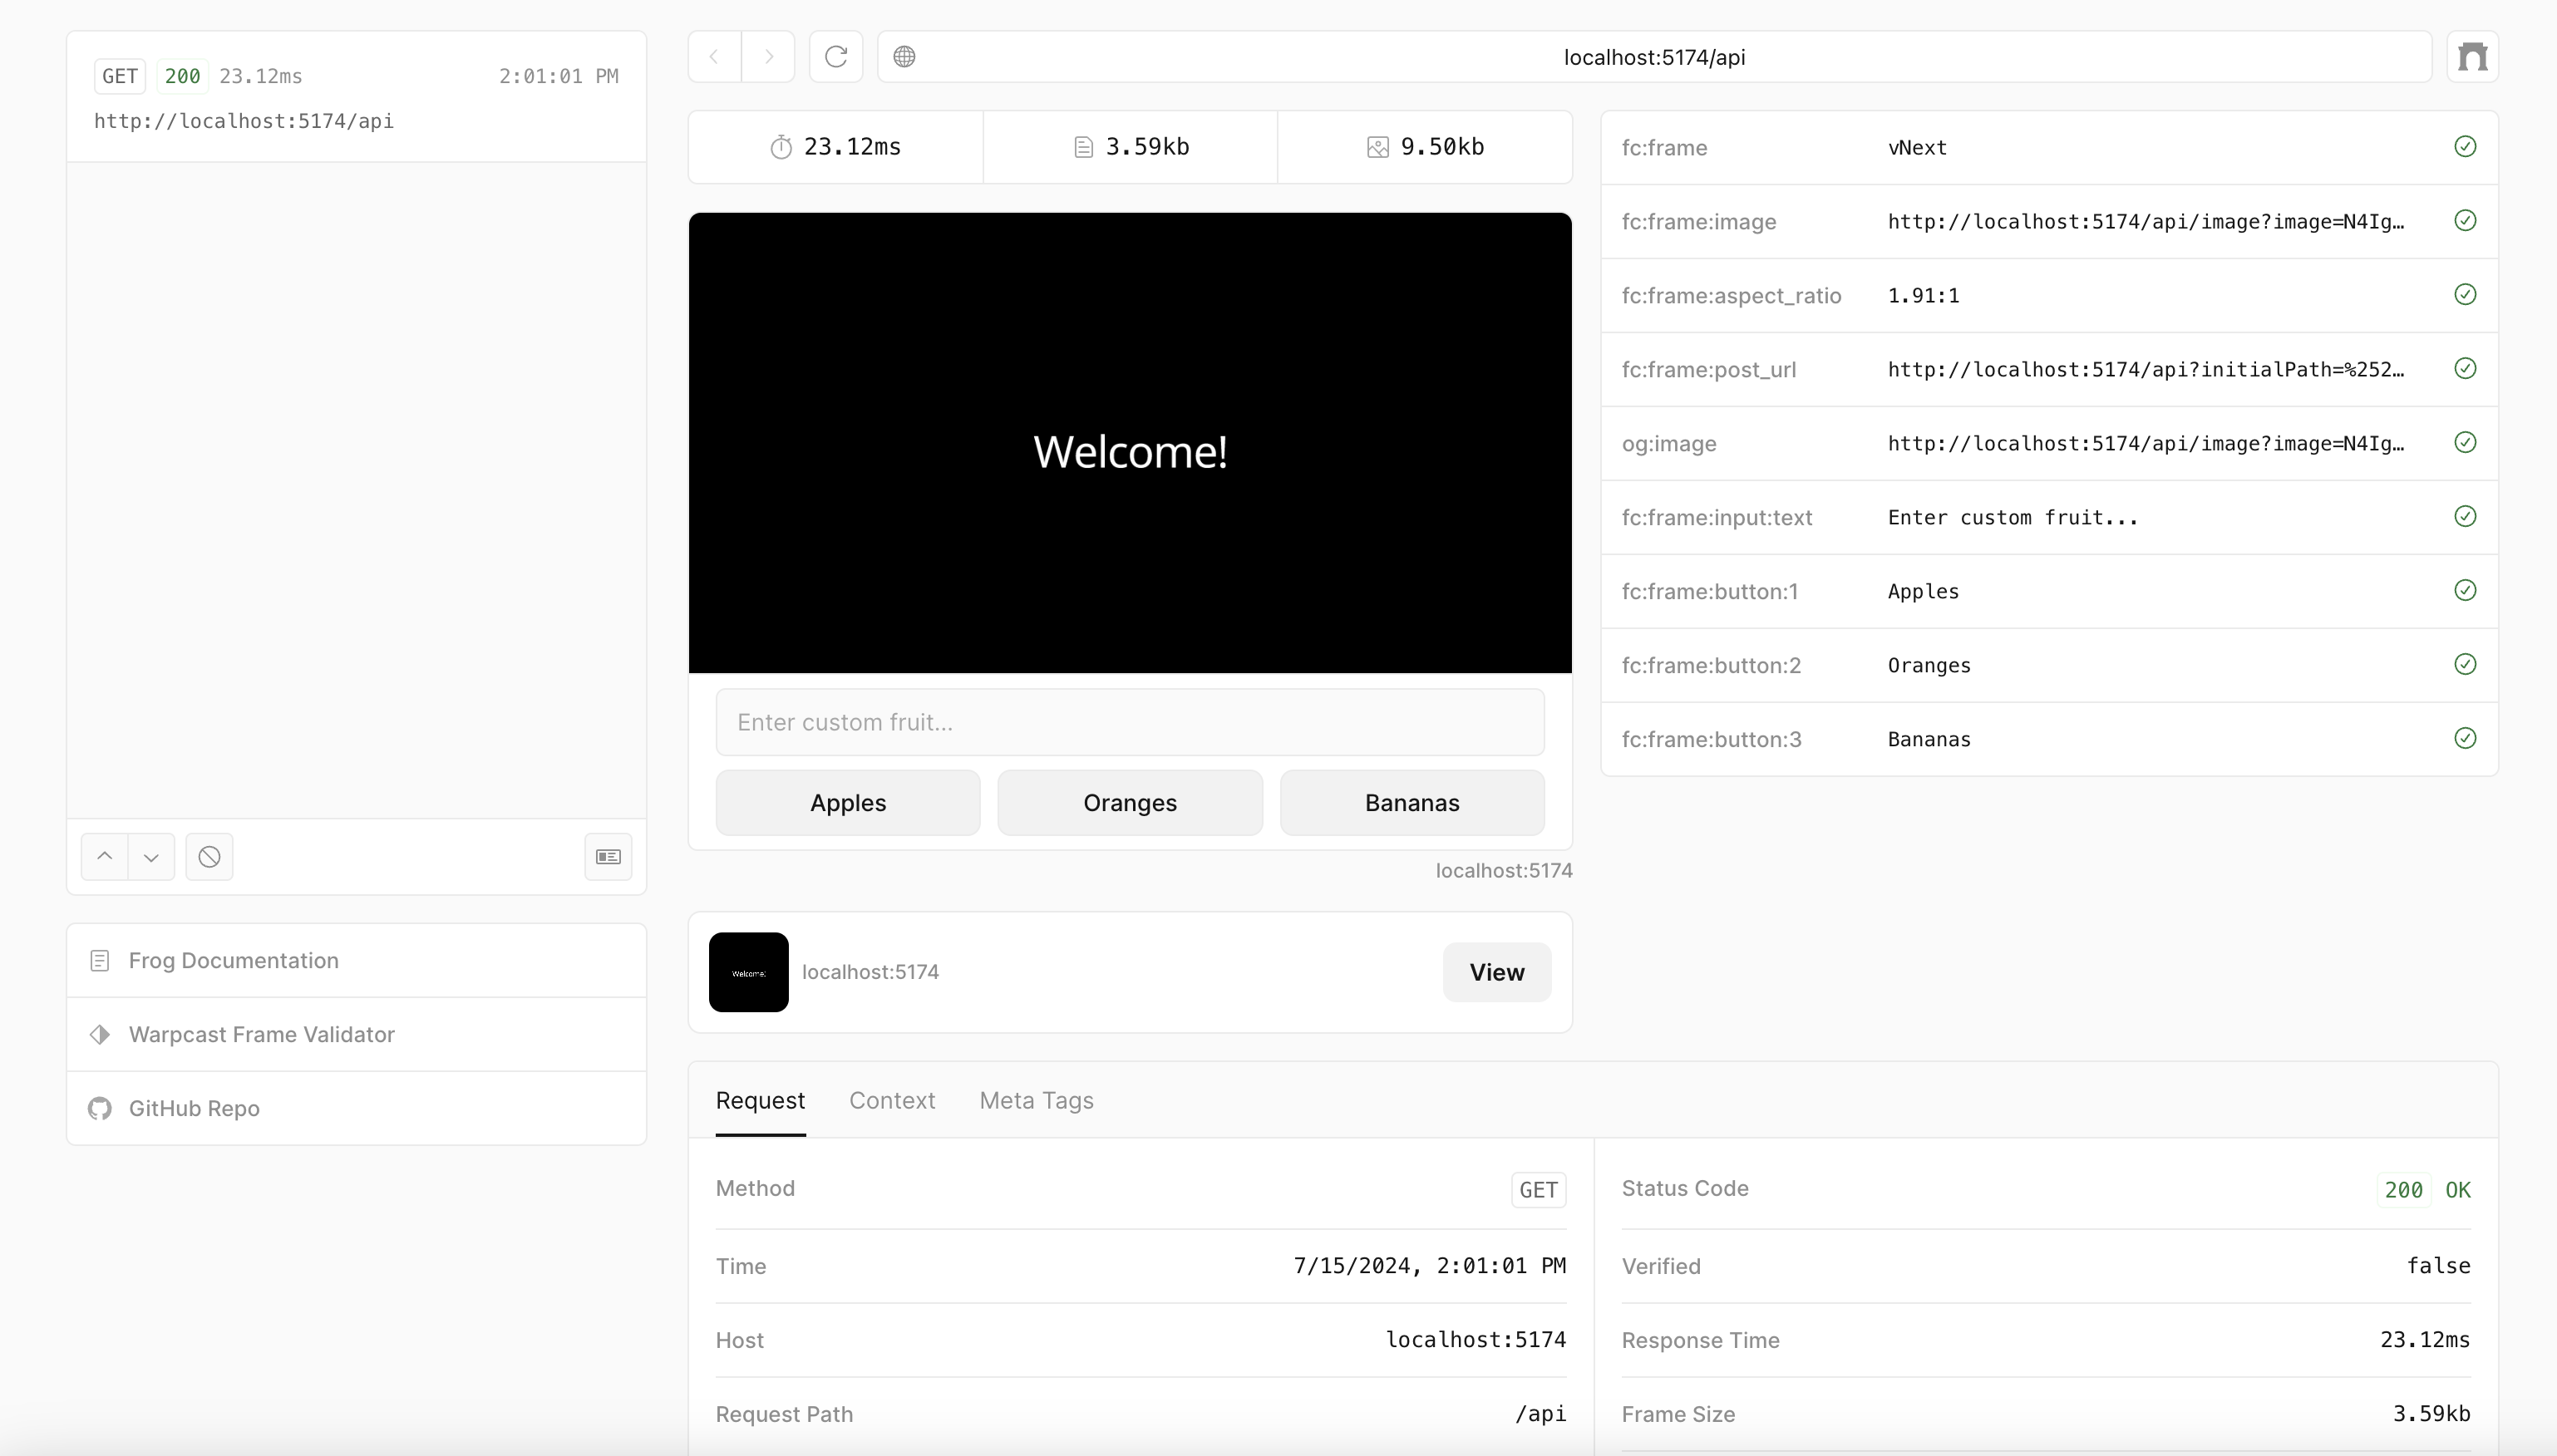
Now that you have a frame server running, navigate to http://localhost:5174/api/dev to interact with your frame in the Devtools preview.
You should see a frame that says "Welcome!" and has three buttons: apples, oranges, and bananas. Click on any of the buttons and the frame will update with a message echoing your choice.
Deploy the frame
INFO
This project was scaffolded for deployment with Vercel since it's a popular and easy option. If you'd like to deploy your Frame another way check out the Frog Platforms documentation.
To distribute your frame your server will need to be hosted somewhere on the internet. Feel free to skip this step and come back later.
npm run deployyarn run deploy.
bunx run deploypnpm run deployComplete the prompts. Once your frame is deployed you can test it end-to-end using the Farcaster Client Frame Validator.
INFO
Make sure to plug the full frame URL in. For Vercel projects this default frame url is located at https://<domain>/api.
Next steps
Here are some next steps now that you have your first Frames project scaffolded and deployed:
- Read through the Frog Concepts documentation to learn how to build a sophisticated, multi-step frame.
- Try scaffolding a project with frames.js and check out their extensive guides and examples.
- Discover more resources for building and learning about frames.
- Read over our best practices for building a great Frame experience.